

Steps to Download and Configure Maven on Ubuntu Server Running Jenkins
Pre-requisites:
Before installing Maven on your Ubuntu server where Jenkins is running, ensure that Java is already installed. If not, you need to install Java first. Follow the steps below:
Installing Java on Ubuntu
Update package lists:
sudo apt-get updateInstall OpenJDK 17:
sudo apt install -y --no-install-recommends openjdk-17-jdk-headlessVerify Java installation:
java -version
Download and Install Maven
Download Maven: Visit the official Maven site here to obtain the latest Maven release.
Copy Binary Tarball Link: Copy the link for the binary tar.gz archive from the Maven website.
Navigate to Opt Directory: Switch to the
/optdirectory using the terminal:sudo su - cd /optDownload Maven Archive: Use
wgetto download the Maven binary tar.gz archive:wget <paste_binary_tarball_link_here> wget https://dlcdn.apache.org/maven/maven-3/3.9.6/binaries/apache-maven-3.9.6-bin.tar.gzExtract Archive: Extract the downloaded tarball:
 tar -xvzf apache-maven-<version_number>-bin.tar.gz
 tar -xvzf apache-maven-3.9.6-bin.tar.gz
Rename Directory: Rename the extracted directory for convenience:
 mv apache-maven-<version_number> maven
 mv apache-maven-3.9.6 maven
Set Environment Variables: Open
.bash_profilein a text editor:sudo vi ~/.bash_profileAdd the following lines to set Java and Maven environment variables:
 export JAVA_HOME=/usr/lib/jvm/java-17-openjdk-amd64
 export M2_HOME=/opt/maven
 export M2=/opt/maven/bin
 export PATH=$PATH:$M2_HOME:$M2:$JAVA_HOME
Save and exit the editor.
Reload Profile: Apply the changes to the current session:
source ~/.bash_profile
Configure Jenkins
Install Maven Integration Plugin: Navigate to Jenkins dashboard -> Manage Jenkins -> Manage Plugins -> Available. Search for "Maven Integration" plugin, install, and restart Jenkins.
Configure Maven and Java Paths: Navigate to Jenkins dashboard -> Manage Jenkins -> Global Tool Configuration. Add JDK and Maven installations, specifying the paths set earlier.
Build Maven Project in Jenkins
Create Maven Project: In Jenkins, create a new item and select "Maven Project".
Project Configuration:
Provide a name and description for the project.
Choose the Git repository for your project.
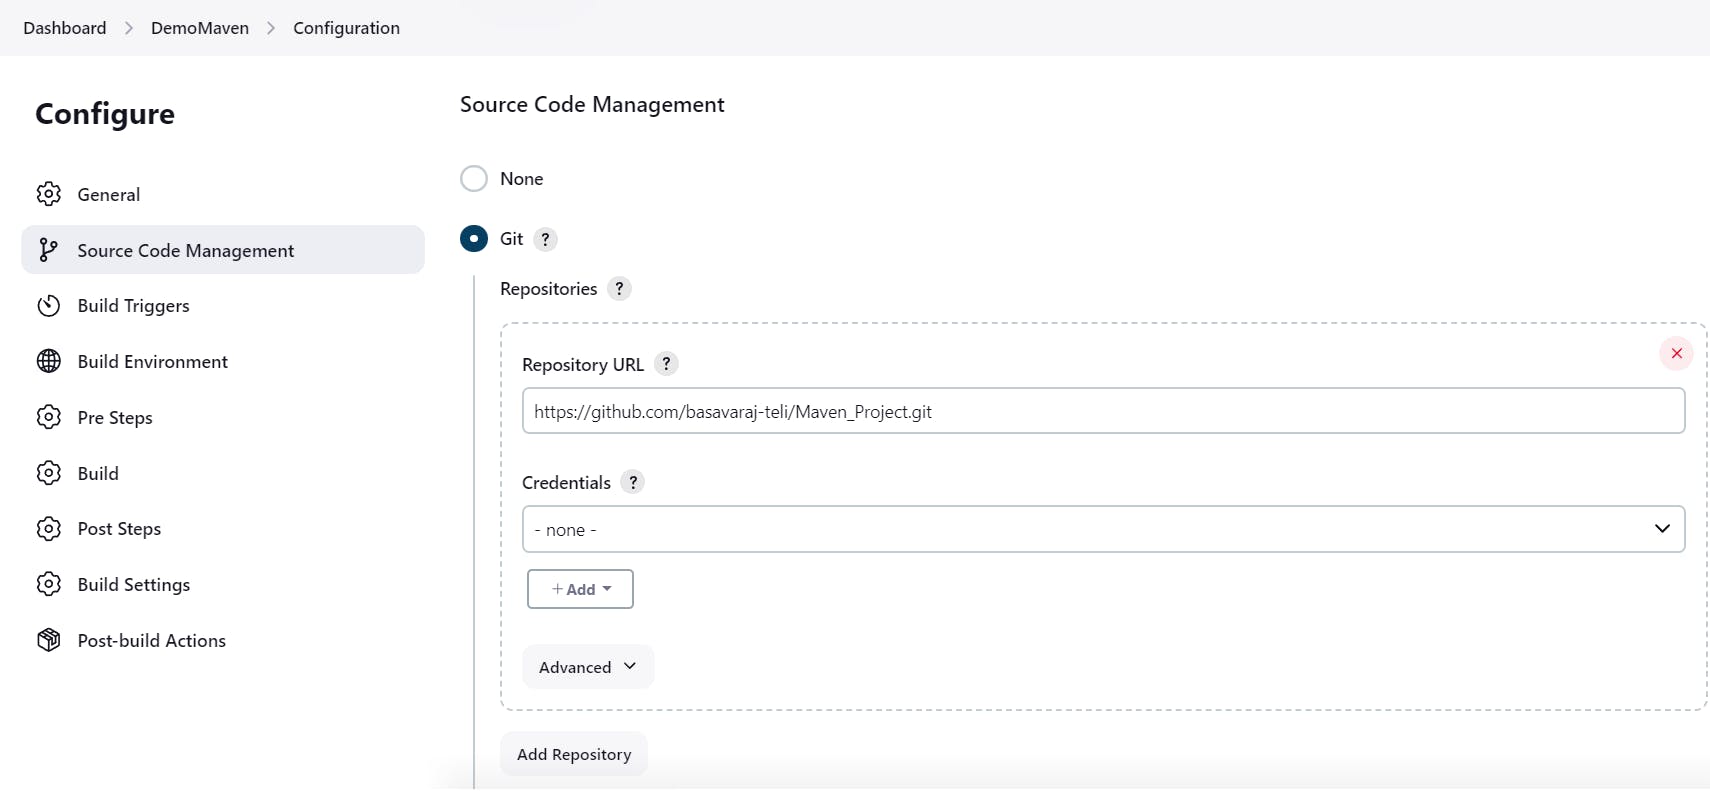
Select "Build Root POM" and specify the path to
pom.xmlin your repository.
Build Configuration:
In the build configuration, define the Maven goals and options such as
clean packageorclean install.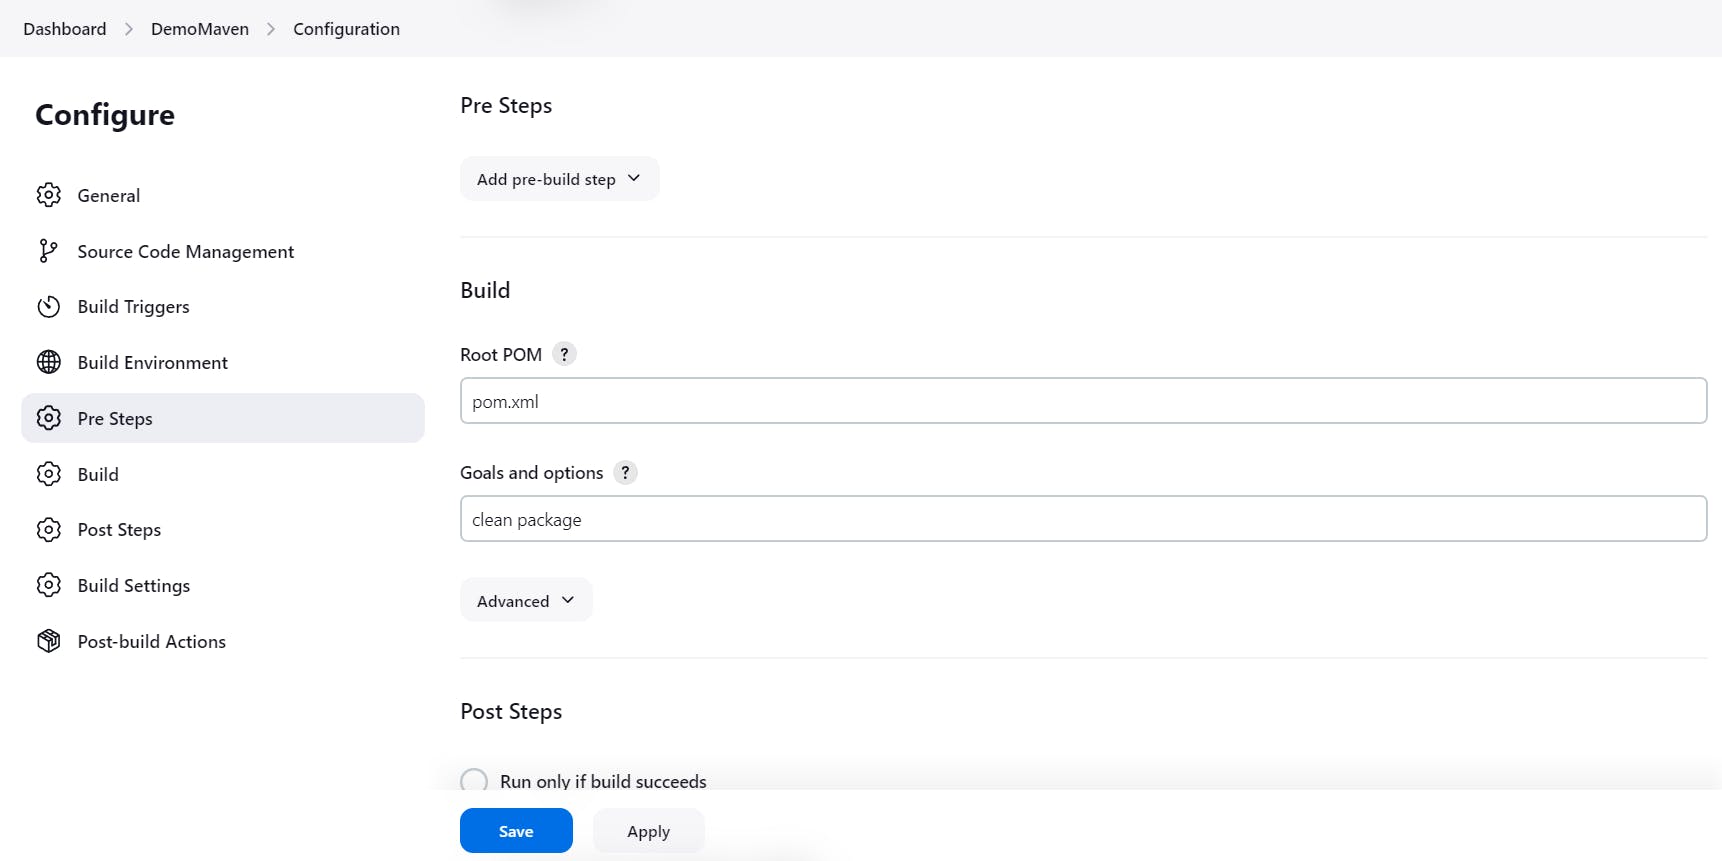
Save and Build: Save the configuration and trigger a build to test the setup.
Additional Information
- For more details on Maven lifecycle, refer to the Maven documentation.
By following these optimized steps, you can efficiently download, install, and configure Maven on your Ubuntu server running Jenkins, ensuring smooth project builds and deployments.